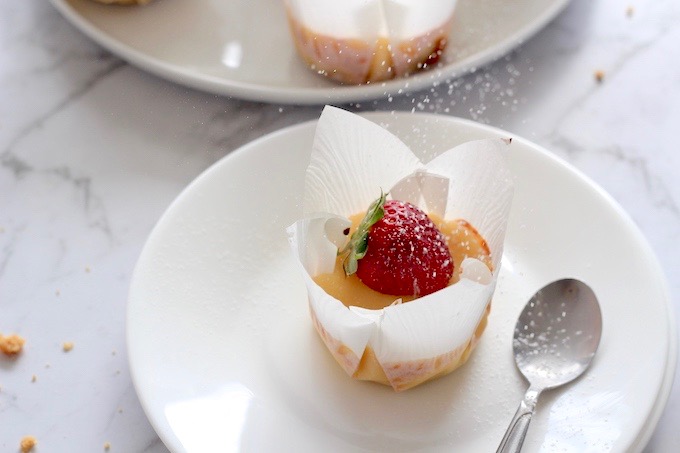
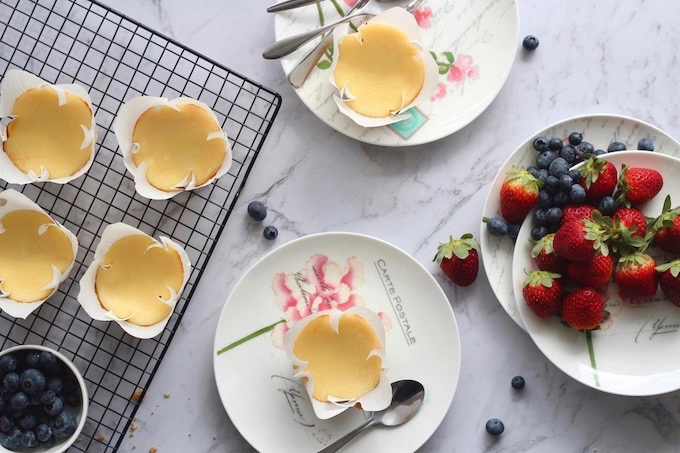
These classic Mini Baked Cheesecakes feature a buttery crust and a velvety, creamy centre. Baked in 6 jumbo muffin tins (or 12 regular cups), these individual cheesecakes are ready by the hour, and simply perfect to serve to your guests or as midweek post-dinner treat!
Many years ago, I strictly stuck to no-bake cheesecakes. They were reliable, delicious, and, most importantly, safe. The young baker in me was easily intimidated by the ‘high-stakes’ reputation of the oven-baked version; between cracked tops and dreaded water bath leaks, it felt like a minefield I wasn’t ready to cross. But eventually, curiosity outweighed my caution. I realised that while no-bake cakes were simple, they lacked the dense, velvety richness of baked cheesecakes.
Looking back, that early hesitation seems a world away. What once felt like a stressful ordeal became one of my favourite kitchen projects, and I’ve found that there is something uniquely satisfying about watching a cheesecake set to perfection. I must say, that confidence was hard-won. I spent weeks in my kitchen obsessing over oven temperatures, cooling times, and the perfect crust-to-filling ratio, determined to eliminate the heartbreak of a sinking centre or a fractured surface.
These mini cheesecakes are the result of those dozens of test batches. By scaling down the classic cake into individual portions, I discovered a way to achieve that signature golden edge without the fuss of a water bath. I’ve refined every step so you can skip the trial and error and go straight to the reward. If you’re looking for a place to start, this recipe is truly foolproof.
Individual Mini Baked Cheesecakes
There is a reason this has become my go-to dessert for everything, from casual Sunday brunches to elegant dinner parties. Unlike a traditional 9-inch cheesecake that requires hours of slow cooling, these individual cheesecake bites are incredibly low-maintenance. They offer the same sophisticated, tangy flavour and “melt-in-your-mouth” texture as a New York-style cheesecake, but with a fraction of the effort and a much faster bake time.
What makes this recipe a winner for both beginners and seasoned bakers is its versatility. You can keep them classic with a simple dusting of icing sugar, or use them as a canvas for seasonal fruit, decadent ganache, or homemade salted caramel. Since they are pre-portioned, they are also the ultimate “make-ahead” dessert as they store beautifully in the fridge in an airtight glass container.
Beyond being delicious and customisable, this recipe is designed to be as stress-free as possible for the home baker:
- No Water Bath Needed: The smaller size means the heat reaches the centre quickly and evenly without needing a bain-marie (water bath).
- Perfect Portion Control: No messy slicing required. Each guest gets their own perfectly formed treat.
- Fool-Proof Texture: By following my tips on room-temperature ingredients, you’ll achieve a velvety, lump-free filling every single time.
- Freezer Friendly: These are excellent for meal prep; you can have a gourmet dessert ready to thaw whenever a craving strikes.
Ingredients
To get that classic, velvety result, the quality and temperature of your ingredients are key. Here is what you’ll need and how to make swaps if you’re baking outside of Australia.
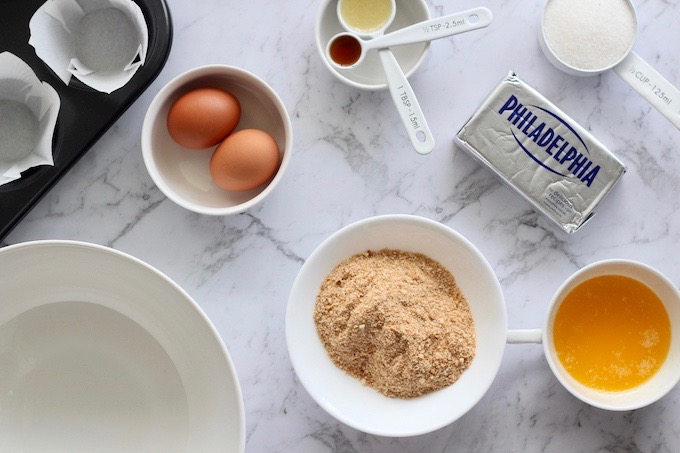
- Cream cheese: For a dense, New York-style texture, you must use full-fat block cream cheese (like Philadelphia). Avoid spreadable tubs, as their high water content prevents the cheesecakes from setting properly.
- Sweet biscuits: In Australia, I use Arnott’s Arrowroot or Marie. For my US readers, an equal weight of Graham Crackers works best, while UK readers can use Digestive Biscuits.
- Sugar: Granulated sugar is used to sweeten the filling and helps achieve those signature golden edges as the cheesecakes bake.
- Fresh lemon juice: Freshly squeezed juice provides the necessary acidity to balance the richness and helps the proteins set. Avoid bottled concentrate for a cleaner, brighter flavour.
- Eggs: Use large eggs at room temperature to ensure a smooth, lump-free batter. If you’re short on time, place cold eggs in warm water for 5 minutes to take the chill off.
- Vanilla extract: A high-quality extract gives that nostalgic, bakery-sweet aroma. You can also substitute with vanilla bean paste if you prefer those beautiful black flecks in your filling.
- Butter: I recommend using melted salted butter for the crust to balance the sweetness of the filling. Unsalted butter also works well if that’s what you have on hand.
The recipe is so simple – it’s practically foolproof. I adapted it from Taste’s Food Editor Tracy Rutherford to include a proper cheesecake base.
How to Make Mini Baked Cheesecakes (Step-by-Step)
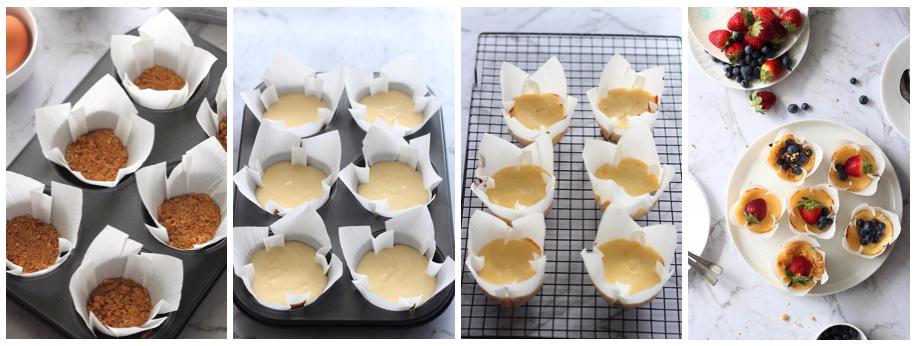
1. Prepare the Base: Start by preheating your oven to 180°C (160°C fan-forced). Meanwhile, crush your biscuits into fine crumbs. I find the easiest way is to pop them in a sturdy Ziplock bag and use a wooden rolling pin to crush them, or, pulsing them in a mini food processor. Mix the crumbs with your melted butter until it looks like wet sand.
2. Press Firmly & Bake: Spoon the mixture into your lined jumbo muffin tin. Here is the pro secret: use the bottom of a small, flat glass/measuring cup to press the crumbs down hard. A firmly packed base won’t crumble when you peel the paper liners off later. Blind bake the crusts for 5 minutes until they are deeply golden and develop a nutty aroma. This extra step ensures the base stays crisp and structural once the velvety filling is added.
3. Prepare the Creamy Filling: In a large bowl, beat your softened cream cheese, sugar, vanilla, and lemon juice using an electric hand mixer on medium-low speed. You want the mixture to be completely smooth before adding the eggs. Once you add the eggs, beat only until just combined, over-mixing at this stage can incorporate too much air, which causes the cheesecakes to puff up and then sink or crack.
4. Bake the Individual Cheesecakes: Divide the batter evenly among the cases. Bake for 20 minutes. You’ll know they are done when the edges are set and slightly golden, but the center still has a slight “wobble” or jiggle when you gently shake the pan. Don’t worry, they will firm up completely as they cool!
5. Gently cool and Serve: To prevent the tops from sinking, let the cheesecakes rest in the tin for 10 minutes on the counter. For the absolute best results, I like to crack the oven door halfway and let them sit inside for a few minutes first. This gradual temperature change is the secret to a perfectly flat, crack-free top.
Frequently Asked Questions
Making the perfect dessert should be stress-free! To help you get the best results with these classic mini baked cheesecakes, I’ve answered the most common questions I get from readers about everything from storage to texture.
How do I know when the mini cheesecakes are finished baking?
Unlike a large cake, these bake quickly. The best way to tell they are done is the “wobble test.” When you gently shake the muffin tin, the edges should be firm and set, but the very center should still have a slight jiggle (like set jelly). This ensures they remain creamy rather than becoming dry or rubbery once cooled.
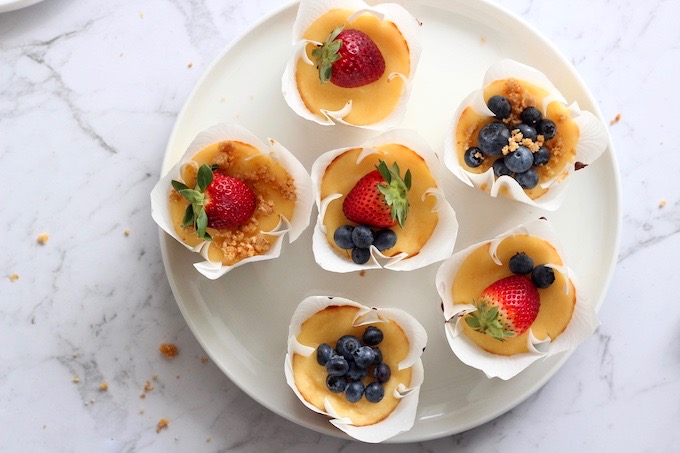
What toppings go well on cheesecake?
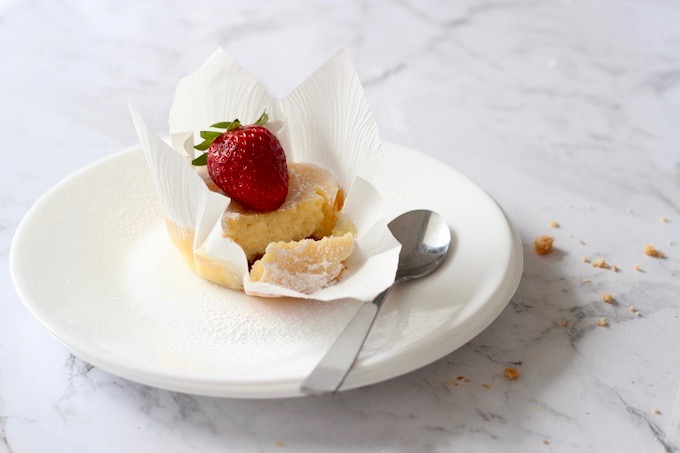
These are amazing topped with whipped cream, seasonal berries, or my personal favourite, a bit of the cheesecake crust, lightly toasted in a pan and served on top as a “crumble”. Other ideas include:
- A mixed seasonal fruit salad topping.
- Chocolate ganache (which can be made with white, milk, or dark chocolate to change up the flavours).
- Jelly with sliced fruits, poured onto the cheesecakes and set in the fridge.
- Dulce de leche or caramel.
- Frosting of choice, such as peanut butter frosting.
- A homemade sauce – including strawberry, blueberry or even a hot fudge sauce.
- Macerated fruit of choice.
Honestly, the ideas are endless, it’s up to you to settle on a flavour – and what a hard task that is! 😉
Can you freeze mini cheesecakes?
Yes! These are incredibly freezer-friendly. Once they have cooled completely and set in the fridge, wrap them individually in plastic wrap and store them in an airtight container for up to 3 months. To serve, simply thaw them in the refrigerator overnight. For the best texture, always add your fresh toppings after thawing.
Essential Tools for Success
To ensure your cheesecakes have that signature flat top and a crust that doesn’t crumble, I recommend using a few key tools. Having these ready on your counter before you start will make the process seamless:
- Jumbo Muffin Tin: This recipe is optimised for a 6-cup jumbo muffin pan. The larger capacity allows for a deeper cheesecake-to-crust ratio, giving you that gourmet bakery look.
- Paper Liners: I always use greaseproof cupcake liners. They prevent the butter from the crust from soaking through, ensuring the sides of your cheesecakes stay clean and easy to peel.
- Small Flat-Bottomed Glass: You don’t need a fancy press! The bottom of a simple stainless steel measuring cup or a small juice glass is the best tool for packing the biscuit base into a firm, even layer.
- Electric Hand Mixer: While you can whisk by hand, an electric hand mixer on a low setting is the best way to ensure the cream cheese is perfectly aerated without over-mixing the eggs.
- Digital Kitchen Scale: For the most consistent results, I always recommend weighing your ingredients. A digital scale is far more accurate than cups, especially for the biscuit base.
Mini Baked Cheesecakes
Ingredients
Cheesecake Filling
- 250 grams cream cheese, softened to room temperature
- ½ cup granulated sugar
- ½ tsp vanilla extract
- 2 eggs
- 1 tbsp lemon juice, see notes
Cheesecake Crust
- 9 plain sweet biscuits
- 60 grams butter, melted
Garnishes (optional)
- seasonal berries
- icing sugar
Instructions
- Preheat oven to 180°C (160°C fan forced) or 350°F (325°C fan forced).Prepare a 6 cup muffin tin by lining with paper liners.
- Prepare the crust: Add biscuits to a ziplock bag and crush with a rolling pin to fine crumbs. Alternatively, pulse in a mini food processor. Add crushed biscuits and melted butter into a bowl and stir well to combine.
- Bake the crust: Spoon into prepared muffin tin and flatten using the bottom of a glass, or back of a spoon. Blind bake the crusts for 5 minutes until they are deeply golden and develop a nutty aroma.
- Prepare the batter: Beat softened cream cheese, sugar, vanilla and lemon juice with electric beaters until smooth.Add eggs and beat again until well combined. Do not over mix.
- Assemble the cheesecakes: Spoon the cream cheese mixture evenly over the prepared crusts. Bake in the preheated oven for 15 minutes, or until the centres wobble slightly when gently shaken.
- Cool & Serve: Once baked, turn off the oven and prop the door open halfway, allowing the cheesecakes to sit inside for 5–10 minutes. This gradual temperature change prevents the tops from cracking. Remove the tin and let it sit on the counter for another 10 minutes before carefully transferring the cheesecakes to a wire rack to cool completely.Once cheesecakes are at room temperature, garnish with berries and icing sugar.
Notes
- Use a regular 12 cup muffin tin and reduce baking time by about 5 minutes if you don't have a 6 cup jumbo muffin tin.
- You can easily substitute lemon juice with your favourite flavour. For example, you can substitute one tablespoon of freshly brewed espresso for a coffee cheesecake.
More Easy Dessert Recipes You’ll Love
If you enjoyed these mini baked cheesecakes, you might also love these other treats from the blog:
- Classic Ricotta Cheesecake: If you’re ready to level up to a full-sized cake, this version is incredibly light and creamy.
- Sweet Cream Cheese Hand Pies: For a lighter, crispier treat that features a similar tangy-sweet center, these Middle Eastern-inspired hand pies are perfect for your next tea time.
- Cream Cheese Lemon Bars by Le Creme de la Crumb: A delicious, citrus-forward treat that pairs a buttery shortbread base with a creamy lemon filling.
- Cream Cheese Cookies by Preppy Kitchen: These pillowy-soft cream cheese cookies are a fantastic addition to any dessert platter.
Leave a Reply